
Getting Started with Arduino
The Arduino platform has since its start in 2005, grown to become one of the most recognizable brands in the space of electronics and embedded design.
But what are the cornerstones of Arduino? What is a "board", how do I write code to it, and what are the tools needed to create my own project? The goal with this guide is to provide you with an overview to the Arduino project.


Arduino Hardware
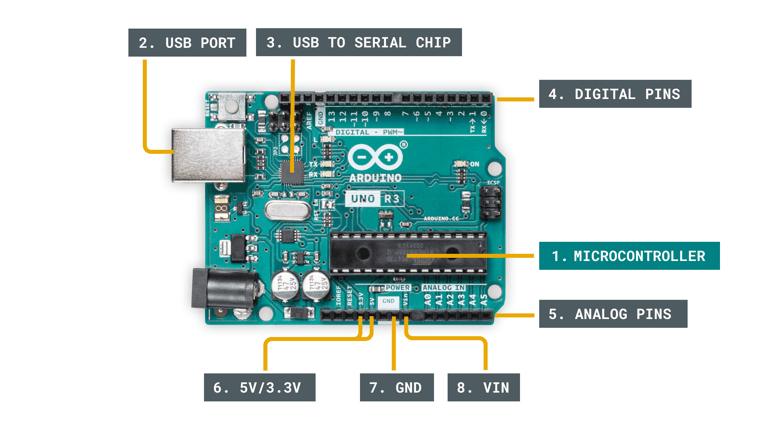
While all Arduino boards differ from each other, there are several key components that can be found on practically any Arduino. Let's take a look at the image below:
Key components of an Arduino board.
1. Microcontroller - this is the brain of an Arduino, and is the component that we load programs into. Think of it as a tiny computer, designed to execute only a specific number of things.
2. USB port - used to connect your Arduino board to a computer.
3. USB to Serial chip - the USB to Serial is an important component, as it helps translating data that comes from e.g. a computer to the on-board microcontroller. This is what makes it possible to program the Arduino board from your computer.
4. Digital pins - pins that use digital logic (0,1 or LOW/HIGH). Commonly used for switches and to turn on/off an LED.
5. Analog pins - pins that can read analog values in a 10 bit resolution (0-1023).
6. 5V / 3.3V pins- these pins are used to power external components.
7. GND - also known as ground, negative or simply -, is used to complete a circuit, where the electrical level is at 0 volt.
8. VIN - stands for Voltage In, where you can connect external power supplies.
Depending on the Arduino board, you will find many more components. The items listed above are generally found on any Arduino board.
Basic Operation
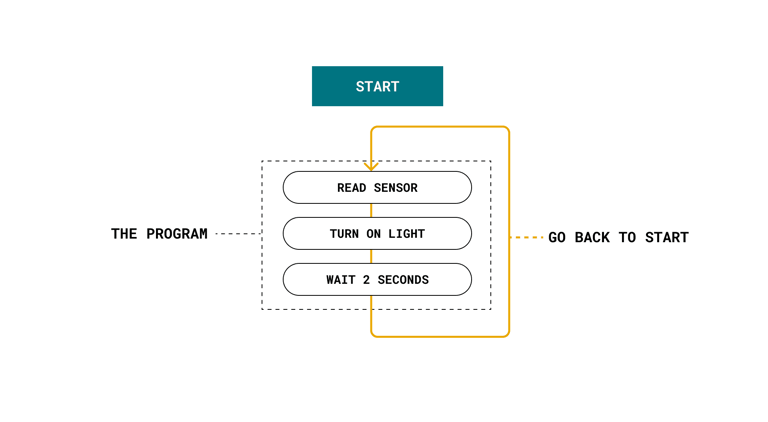
Most Arduino boards are designed to have a single program running on the microcontroller. This program can be designed to perform one single action, such as blinking an LED. It can also be designed to execute hundreds of actions in a cycle. The scope varies from one program to another.
The program that is loaded to the microcontroller will start execution as soon as it is powered. Every program has a function called "loop". Inside the loop function, you can for example:
Read a sensor.
Turn on a light.
Check whether a condition is met.
All of the above.
The speed of a program is incredibly fast, unless we tell it to slow down. It depends on the size of the program and how long it takes for the microcontroller to execute it, but it is generally in microseconds (one millionth of a second).
Circuit Basics
Circuits consist of at least one active electronic component, and a conductive material, such as wires, so that current can pass through. When working with an Arduino, you will in most cases build a circuit for your project.
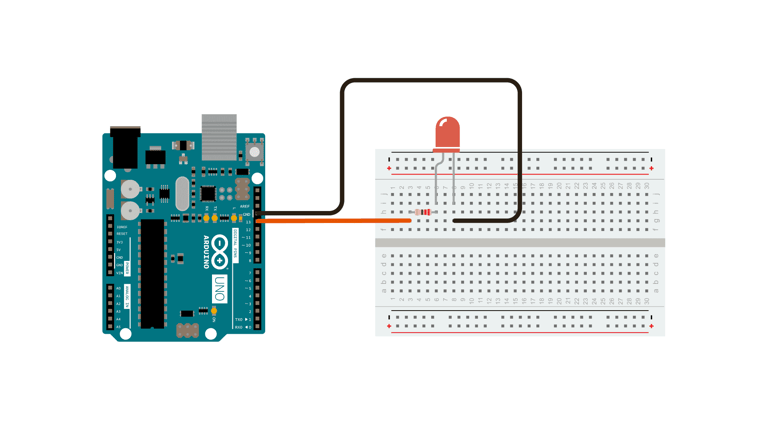
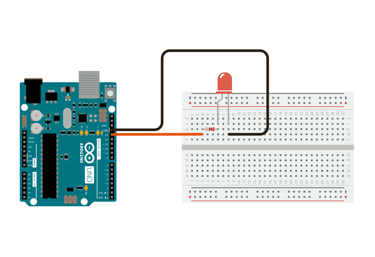
A simple example of a circuit, is an LED circuit. A wire is connected from a pin on the Arduino, to an LED via a resistor (to protect the LED from high current), and finally to the ground pin (GND). When the pin is set to a HIGH state, the microcontroller on the Arduino board will allow an electric current to flow through the circuit, which turns on the LED. When the pin is set to a LOW state, the LED will turn off, as an electric current is not flowing through the circuit.
An LED circuit with an Arduino.
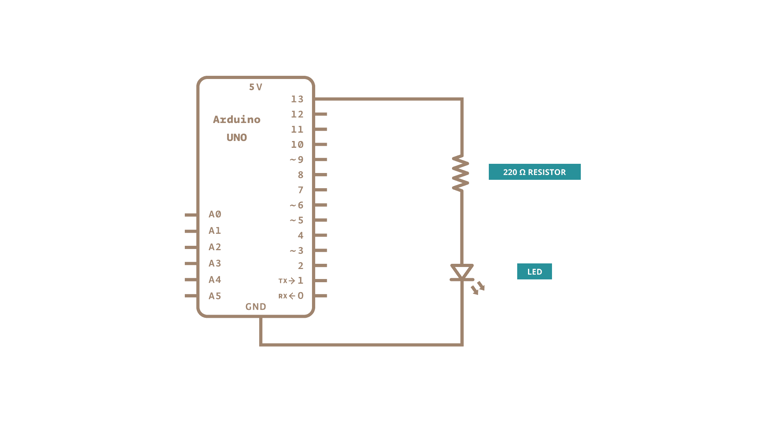
Circuits are typically represented as schematics, which are the blueprints for your circuit. The image below shows the schematic's representation of the same circuit shown in the image above.

Explore Arduino Technology
Discover the power of Arduino: open-source electronics platform for building innovative projects and prototypes.